
Tune your radar
See moving and still radar activity, adjust detection distances and sensitivity, and tune Litos for your room.
Firmware required: v1.4.0 or later for Litos. Update your Litos before using the Radar tuner.
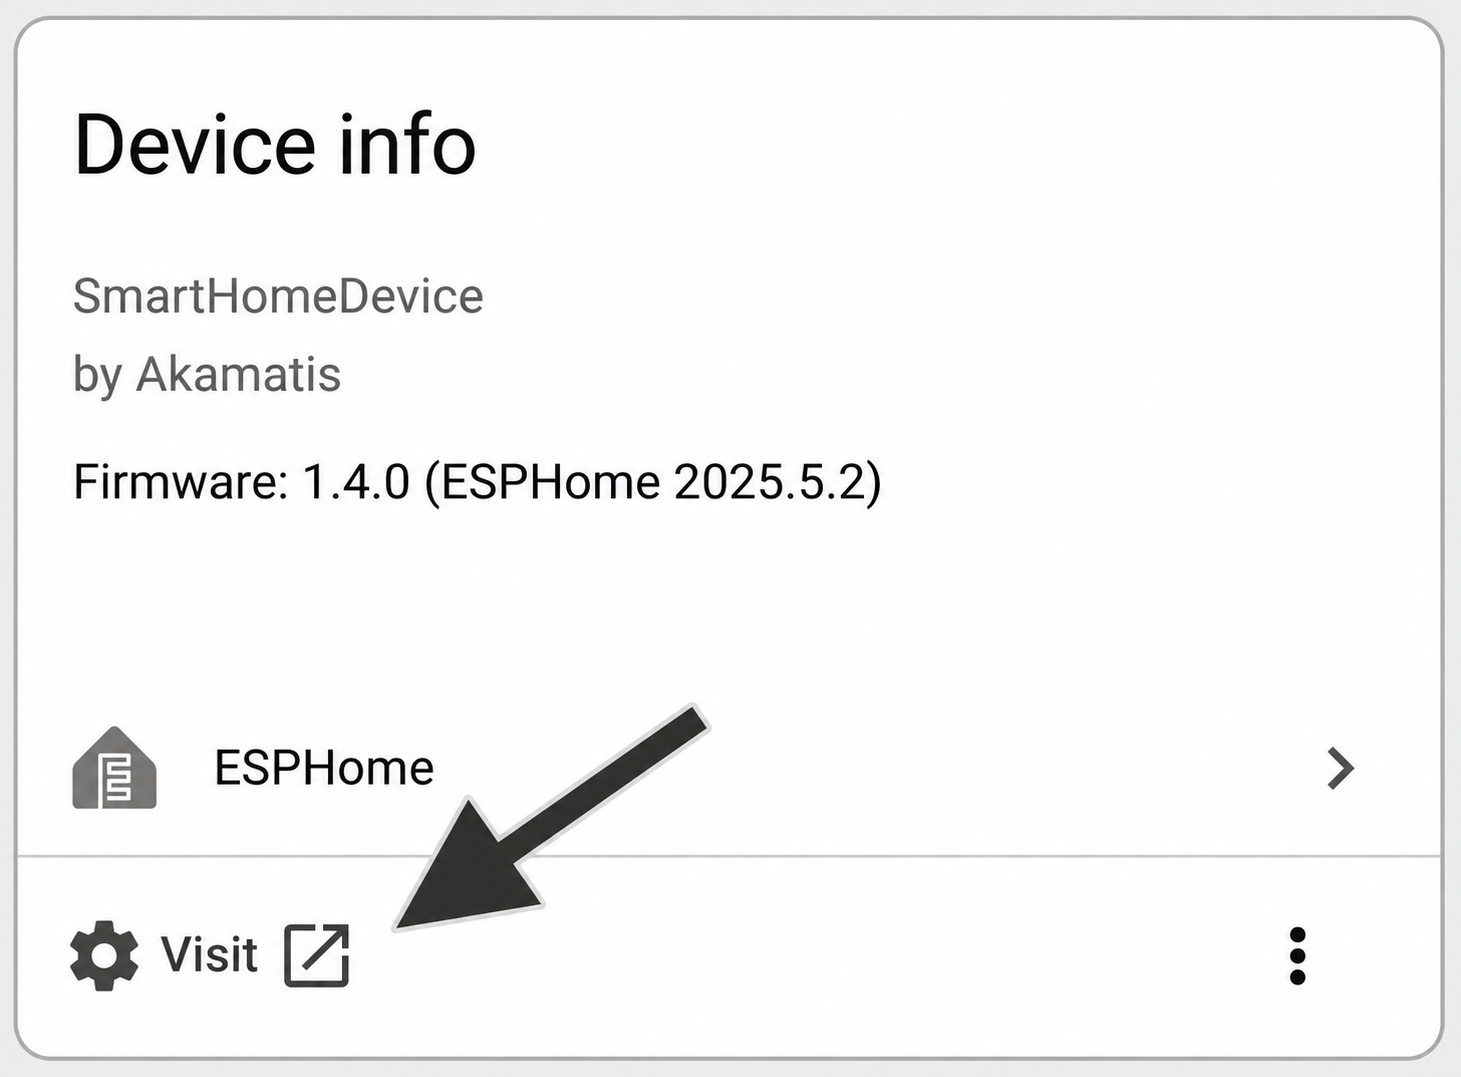
Before you start: add Litos to Home Assistant and mount it in its final position. Use a phone or computer on the same local network. Open the Litos device page in Home Assistant and click Visit to open the Radar tuner.
Open the Radar tuner
On your Litos device page in Home Assistant, find the Device info card. Click Visit at the bottom-left corner to open the tuner hosted on your Litos.
Get to know the tuner
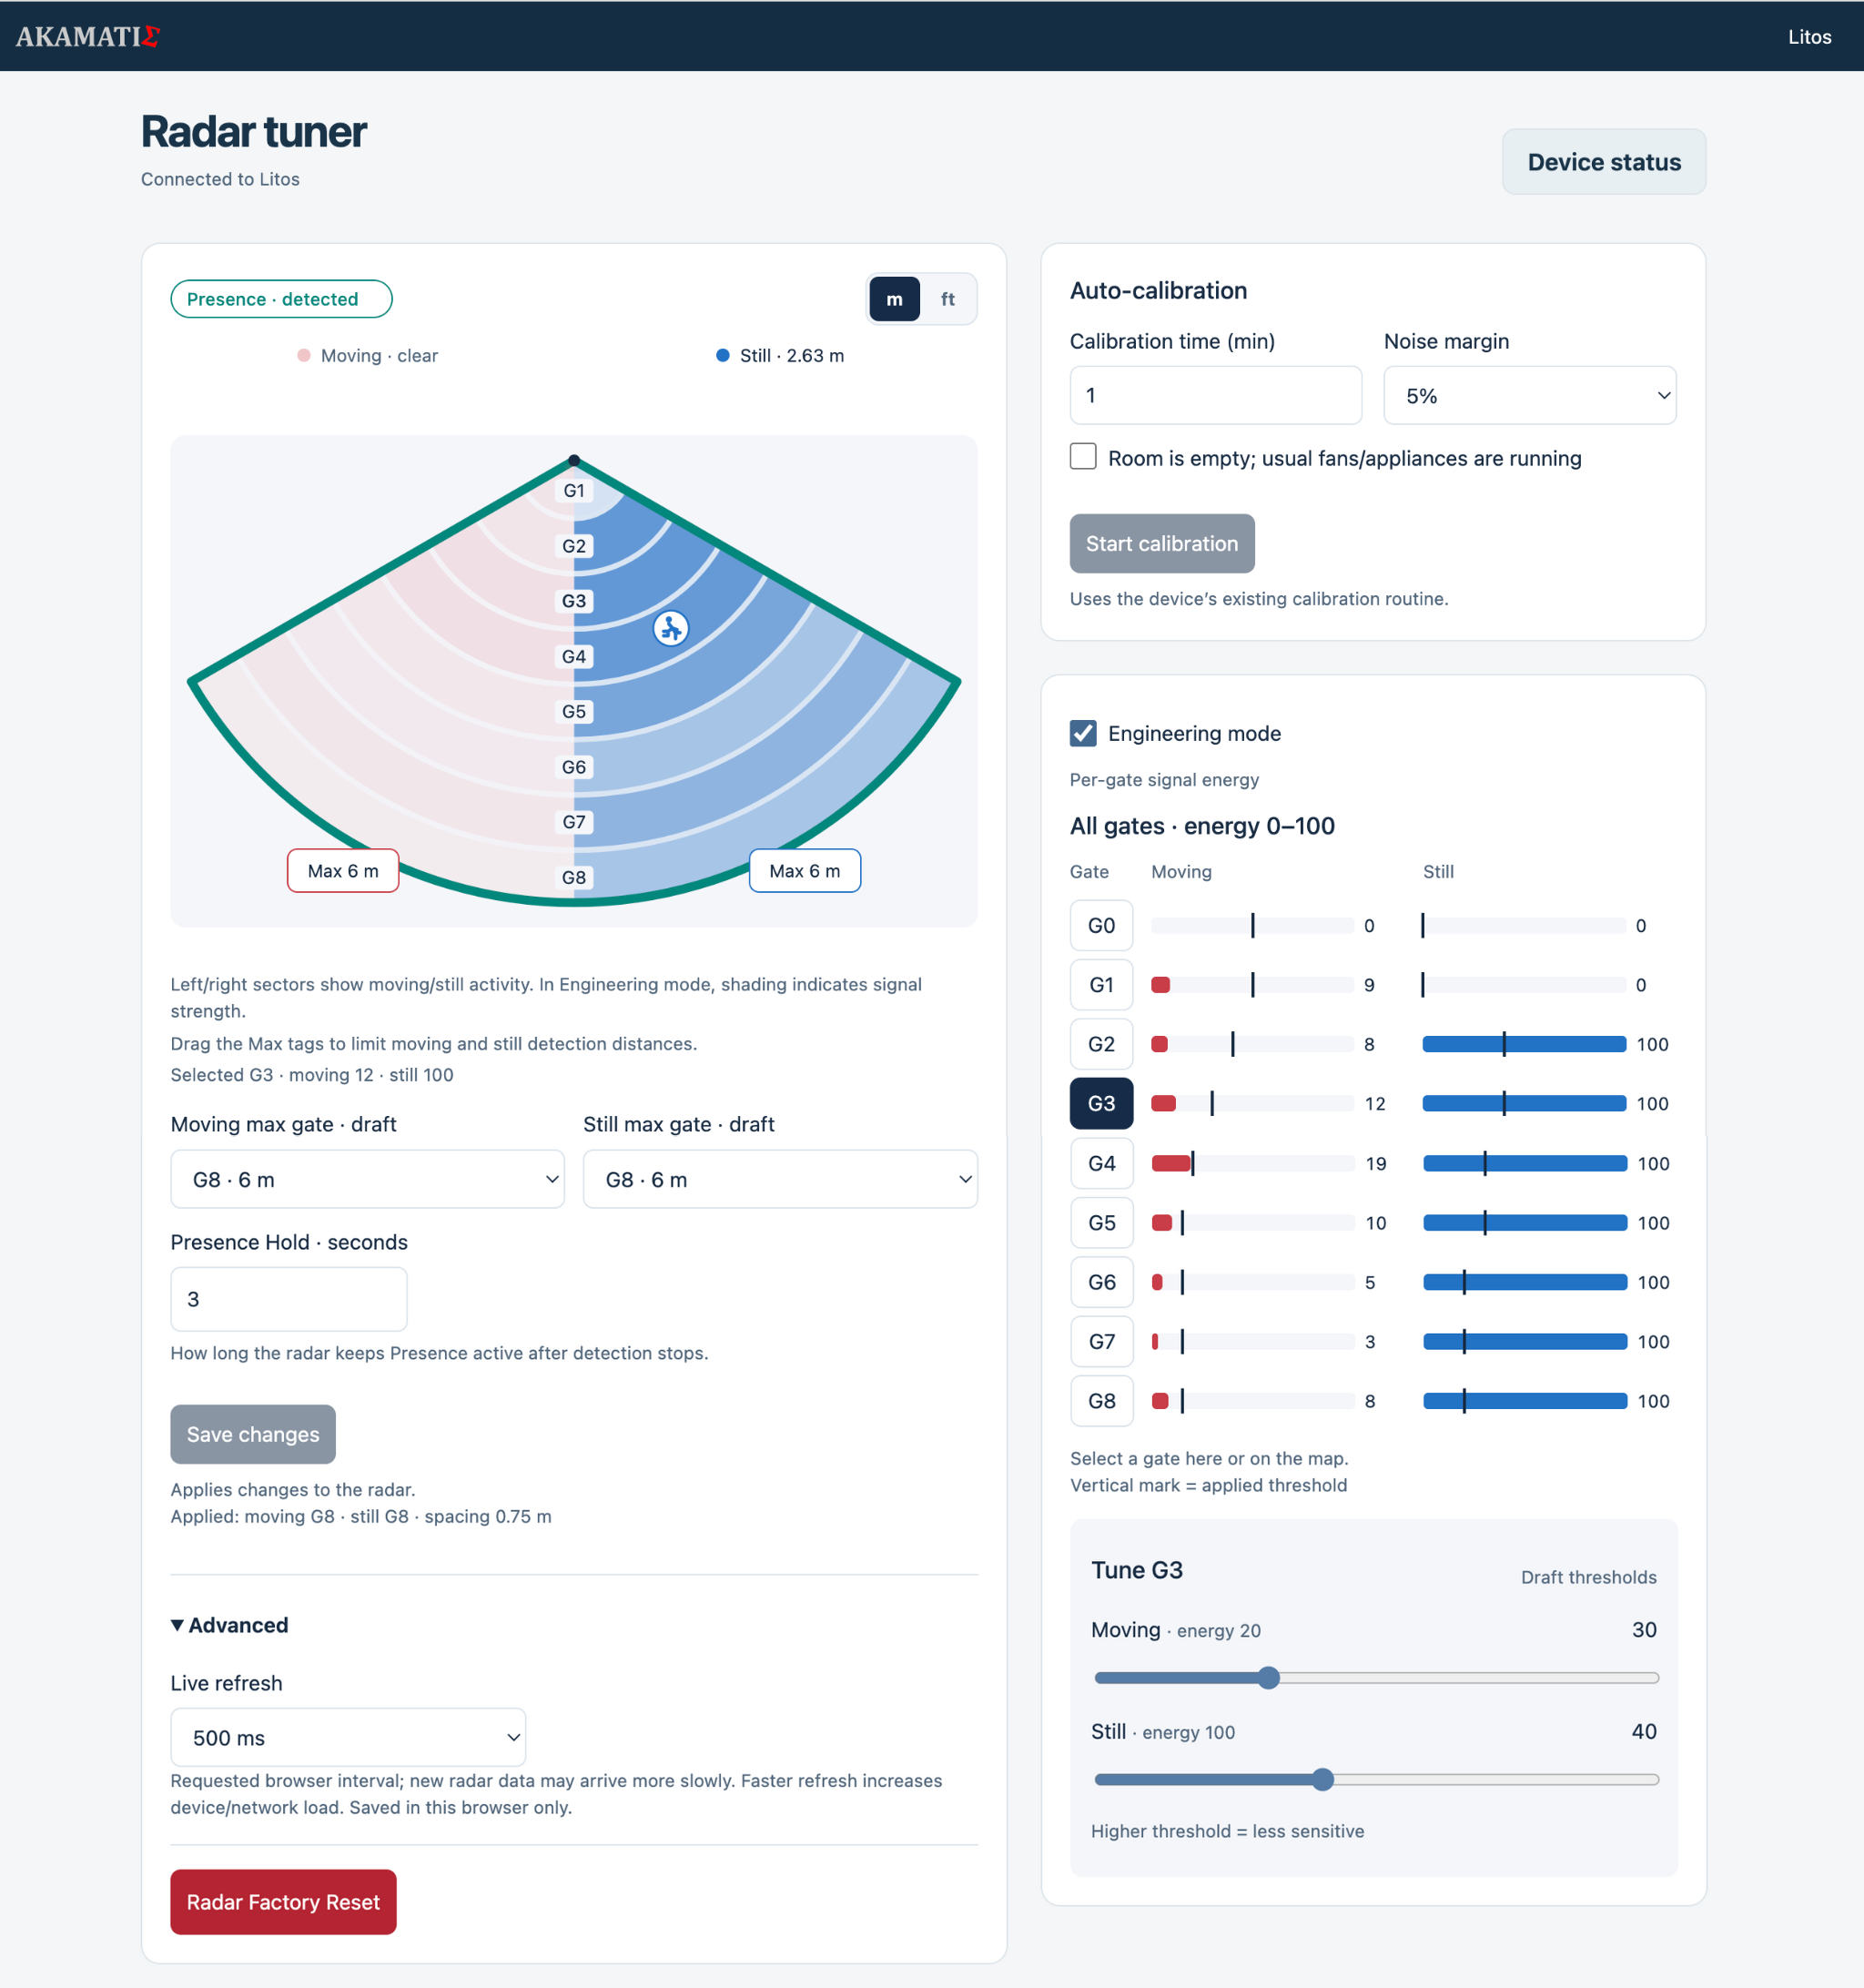
Select a numbered area to see what it does.
Observe, tune, test
Check detection
Walk through the area you want to cover, including its farthest point, then sit still. Watch Presence and the moving/still readings to see how Litos responds before changing settings.
Set the range
Drag the red and blue Max tags or choose maximum gates to set moving and still distances independently. Keep the still range long enough to detect a seated person. Click Save changes before testing the new limits.
Calibrate the room
Enable Engineering mode. Choose a calibration time of 1–10 minutes and a noise margin. Leave the room empty with usual fans and appliances running, confirm the checkbox, then click Start calibration and wait for it to finish.
Fine-tune settings
If needed, select a gate on the map or in the energy list and adjust its moving/still thresholds. Higher thresholds reduce sensitivity; lower thresholds accept weaker signals. Set Presence Hold to choose the clearance delay. Change a few settings at a time.
Save and test
Click Save changes and wait for confirmation. Test walking, seated presence and an empty room with normal equipment running. Check the presence entity and your automation in Home Assistant. Switch Engineering mode off when finished.
Save your changes to apply the new settings. Range, Presence Hold and manual threshold edits remain drafts until saved. Click Save changes or the map’s floppy-disk icon and wait for confirmation.
Calibration adjusts thresholds; it does not choose your range or Presence Hold. If unwanted activity overlaps useful detection distances, try repositioning Litos before raising thresholds further.